JS文件压缩成PNG图像存储方法
你有没有想过:为了压缩js文件,把js文件转化成PNG图像,然后用 canvas 控件中的 getImageData() 函数将图像再重新读成js文件。我昨天在这里发表的JS文件快速加载的文章中提到了这一方法,有网友对这个做法很感兴趣,于是今天详细解读一下。
这样可以做到很高的压缩比,到底有多高,下面会提到。这种方法用到了 canvas 控件,这也意味着只有支持 canvas 控件的浏览器下才有效。

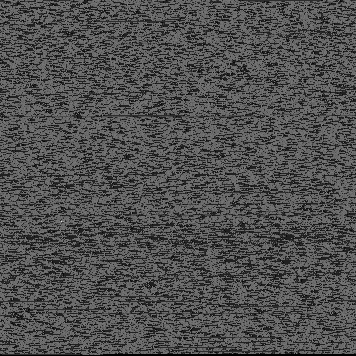
现在你可以看到,上面的图像类似一个噪声图像,但它实际上是一个由124K的 prototype 框架代码转化成的30K的8位PNG图像(压缩比还不错吧)。
其实,要将代码转化为图像的格式存储,可以转化成GIF和PNG格式。PNG格式的图像有24位和8位,用24位的RGB图像,每个像素可以存储3字节的数据,如果是用8位的RGB图像,每个像素可以存储1字节的数据。
在PHOTOSHOP中做测试发现:一个300x100的纯色杂点8位图像可以压缩到5K,而同样的纯色杂点图像,如果是100x100的24位图像只能压缩到20K。如果是同样图案的8位GIF图像,压缩效果比PNG要差一些。所以,我们选择用8位的PNG图像作为压缩和解压缩的存储格式。
现在,我们就需要开始压缩图像了,下面是用PHP写的压缩文件的方法:
<?php
$filename="http://php.hhsy.cc/js/jquery.min.js";
if(file_exists($filename)){
	$iFileSize=filesize($filename);
	$iWidth=ceil(sqrt($iFileSize/1));
	$iHeight=$iWidth;
	$im=imagecreatetruecolor($iWidth,$iHeight);
	$fs=fopen($filename,"r");
	$data=fread($fs,$iFileSize);
	fclose($fs);
	$i=0;
	for($y=0;$y<$iHeight;$y++){
		for($x=0;$x<$iWidth;$x++){
			$ord=ord($data[$i]);
			imagesetpixel($im,$x,$y,imagecolorallocate($im,$ord,$ord,$ord));
			$i++;
		}
	}
	header("Content-Type:image/png");
	imagepng($im);
	imagedestroy($im);
}
它读取JS文件并创建一个PNG图像,图像中的每个像素中是一个0-255之间的值,而这个值对应的是JS字符的ascII的值。
当然,除了压缩,还要有解压缩,也就是将图像读取为JS文件的过程。这个函数是用JS写的,具体代码如下:
function loadPNGData(strFilename,fncCallback){
    var bCanvas=false;
    var oCanvas=document.createElement("canvas");
    if(oCanvas.getContext){
        var oCtx=oCanvas.getContext("2d");
        if(oCtx.getImageData){
            bCanvas=true;
        }
    }
    if(bCanvas){
        var oImg=new Image();
        oImg.style.position="absolute";
        oImg.style.left="-10000px";
        document.body.appendChild(oImg);
        oImg.onload=function(){
            var iWidth=this.offsetWidth;
            var iHeight=this.offsetHeight;
            oCanvas.width=iWidth;
            oCanvas.height=iHeight;
            oCanvas.style.width=iWidth+"px";
            oCanvas.style.height=iHeight+"px";
            var oText=document.getElementById("output");
            oCtx.drawImage(this,0,0);
            var oData=oCtx.getImageData(0,0,iWidth,iHeight).data;
            var a=[];
            var len=oData.length;
            var p=-1;
            for(var i=0;i<len;i+=4){
                if(oData[i] > 0)
                    a[++p]=String.fromCharCode(oData[i]);
            };
            var strData=a.join("");
            if(fncCallback){
                fncCallback(strData);
            }
            document.body.removeChild(oImg);
        }
        oImg.src=strFilename;
        return true;
    } else{
        return false;
    }
}
最后给出在线测试地址,在这个网页上,您可以在列表中选择一个PNG图像文件,点击 load file 按钮可以在网页上看到这个图像,在图像的下面是由这个图像所读出来的代码文件。
